an excerpt from Chapter 6 of…
Data Splitting Workflow Profile
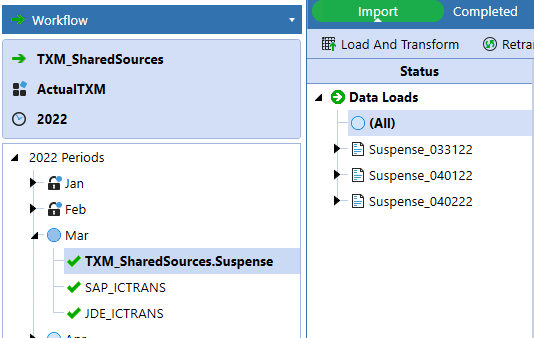
Data splitting provides the ability to divide a single data source between numerous data sets across multiple Match Sets. This flexibility enables a file to be accessed across different areas such as departments or divisions, while controlling access and visibility through the separate Match Sets. This drop-down contains all Workflow Profiles within the OneStream Application. Select the Workflow Profile that is to be used for data splitting. This Workflow Profile will not have the ability to perform any matching activity (as shown in Figure 6.1); rather, this is simply an import profile to be used when a single file contains data that must be split into different Match Sets.

Let’s walk through a couple of examples as to when data splitting would be necessary.
Within this section, we will show screenshots from within the Administration page, the setup of which will be discussed later. This information is given now to provide a context of when and why you would use data splitting. One instance would be if you have a single file that contains all suspense activity – both debits and credits – and you need to compare the debit activity to the credit activity. Transaction Matching requires at least two data sets, so matching would not be possible unless:
- Your IT department uses the initial file to create two separate files.
- Your IT department creates two different data sources for the file, one for debits and one for credits.
- Or you create a data-splitting Workflow Profile.
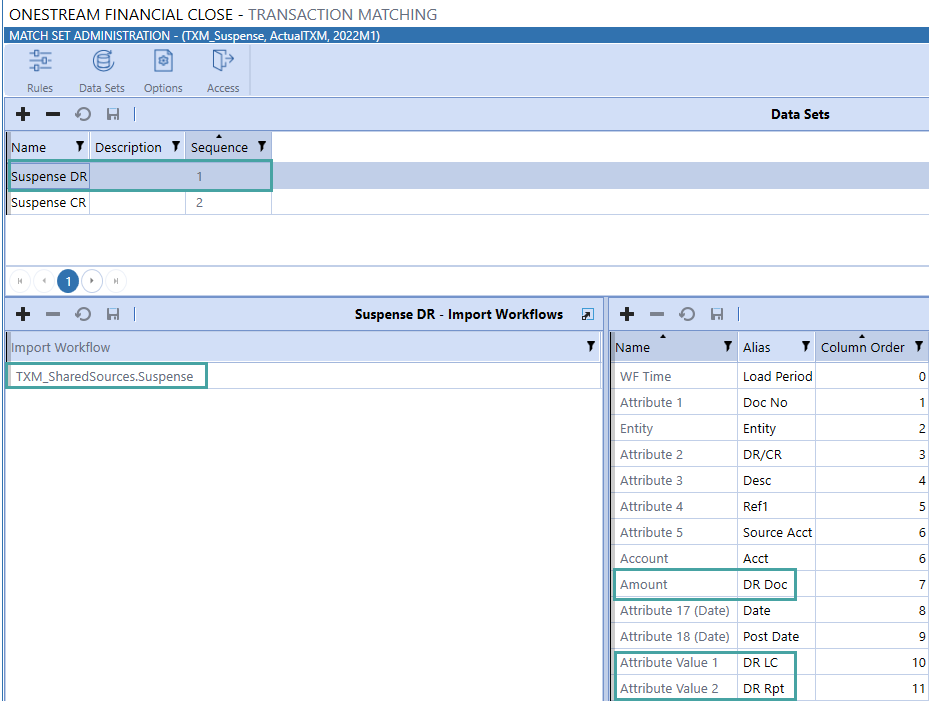
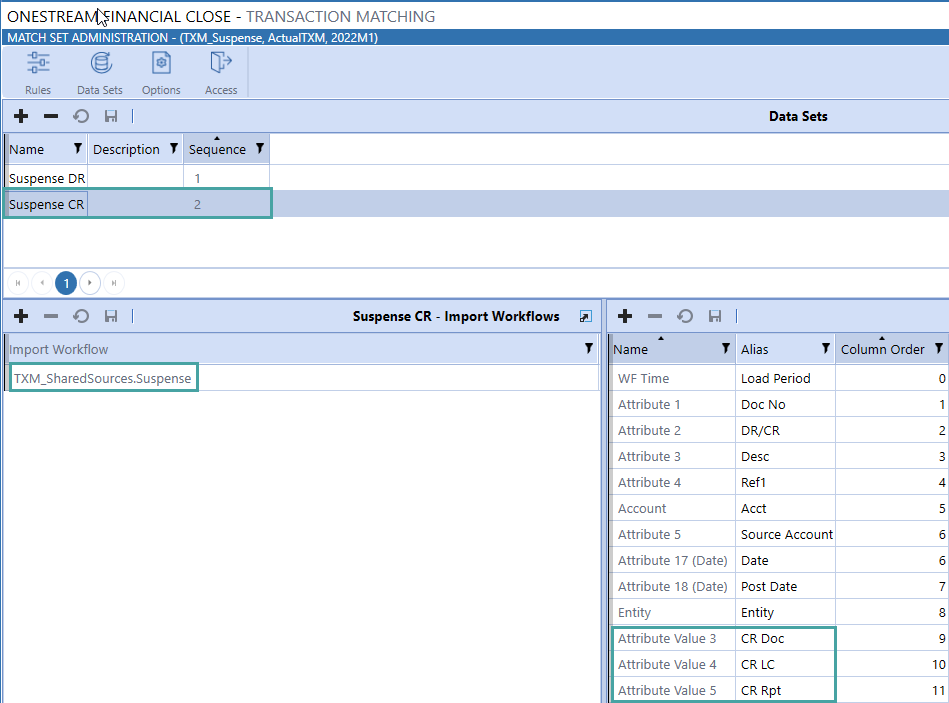
Choosing the third option is definitely best from a OneStream Administrator’s perspective, as it gives the finance User the ability to administer the file without IT involvement. For this example, you would import the suspense file, and the debit amount (Figure 6.2) would be the amount being compared for the first data set, and the credit (Figure 6.3) would be the amount compared for the second within the Transaction Matching Administration page. Note that both data sets have the same Import Workflow Profile but are comparing different columns of values.


Another example of when data splitting would be useful would be for Intercompany matching.
In many instances, all Intercompany balances are held within a single, top-level Account, and the Entity balances are held within that roll-up. Let’s assume your company’s total Intercompany Payables are held on Account 20XXX, and you use this Account number to pull the total balance, and each Entity’s Intercompany Payables balance is input into XXX to pull up their specific balance (e.g., if Houston Heights is Entity number 002, the corresponding Intercompany Payables Account for that Entity is 20002).
As you can imagine, creating different connectors or files for each Entity would be extremely cumbersome for IT, so here is where a reader can come in as a superstar Administrator! Utilize data splitting for your Intercompany payables file and create Match Sets where ownership exists.
What do we mean by this?
Creating Match Sets for each Entity also wouldn’t be desirable from a OneStream perspective because you don’t want to have to maintain rules and set up for thousands of companies. Instead, split the data up to a level appropriate for your company’s maintenance. Maybe you have Shared Services in North America, AMEA, and APAC, so – in this instance – three Match Sets would be ideal because you have ownership at each level. Furthermore, you can set security at the Entity level on data, so if Users should only be able to see transactions for specific Entities – for which they have read/write permissions – we can prevent them from seeing data that does not relate to them (discussed in Data Security).
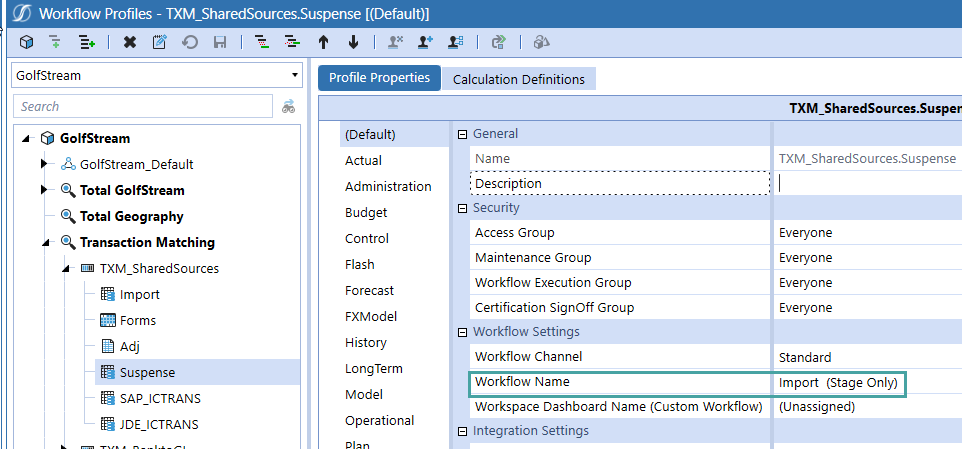
In order to assign a data splitting Workflow Profile, it must first be created within the Application tab. Note that the examples shown throughout this book are within a separate Parent-level Workflow Profile, Transaction Matching. Creating a separate Workflow Profile for Transaction Matching is not necessary. The Profile Properties for the data splitting Workflow Profile should be set as shown in Figure 6.4.

For all import steps added (data to be split), follow Figure 6.5.


